Tick protocol
Jump to navigation
Jump to search

Nymph tick collection
- Questing seasson: June 10 - July 10 in Northeast US
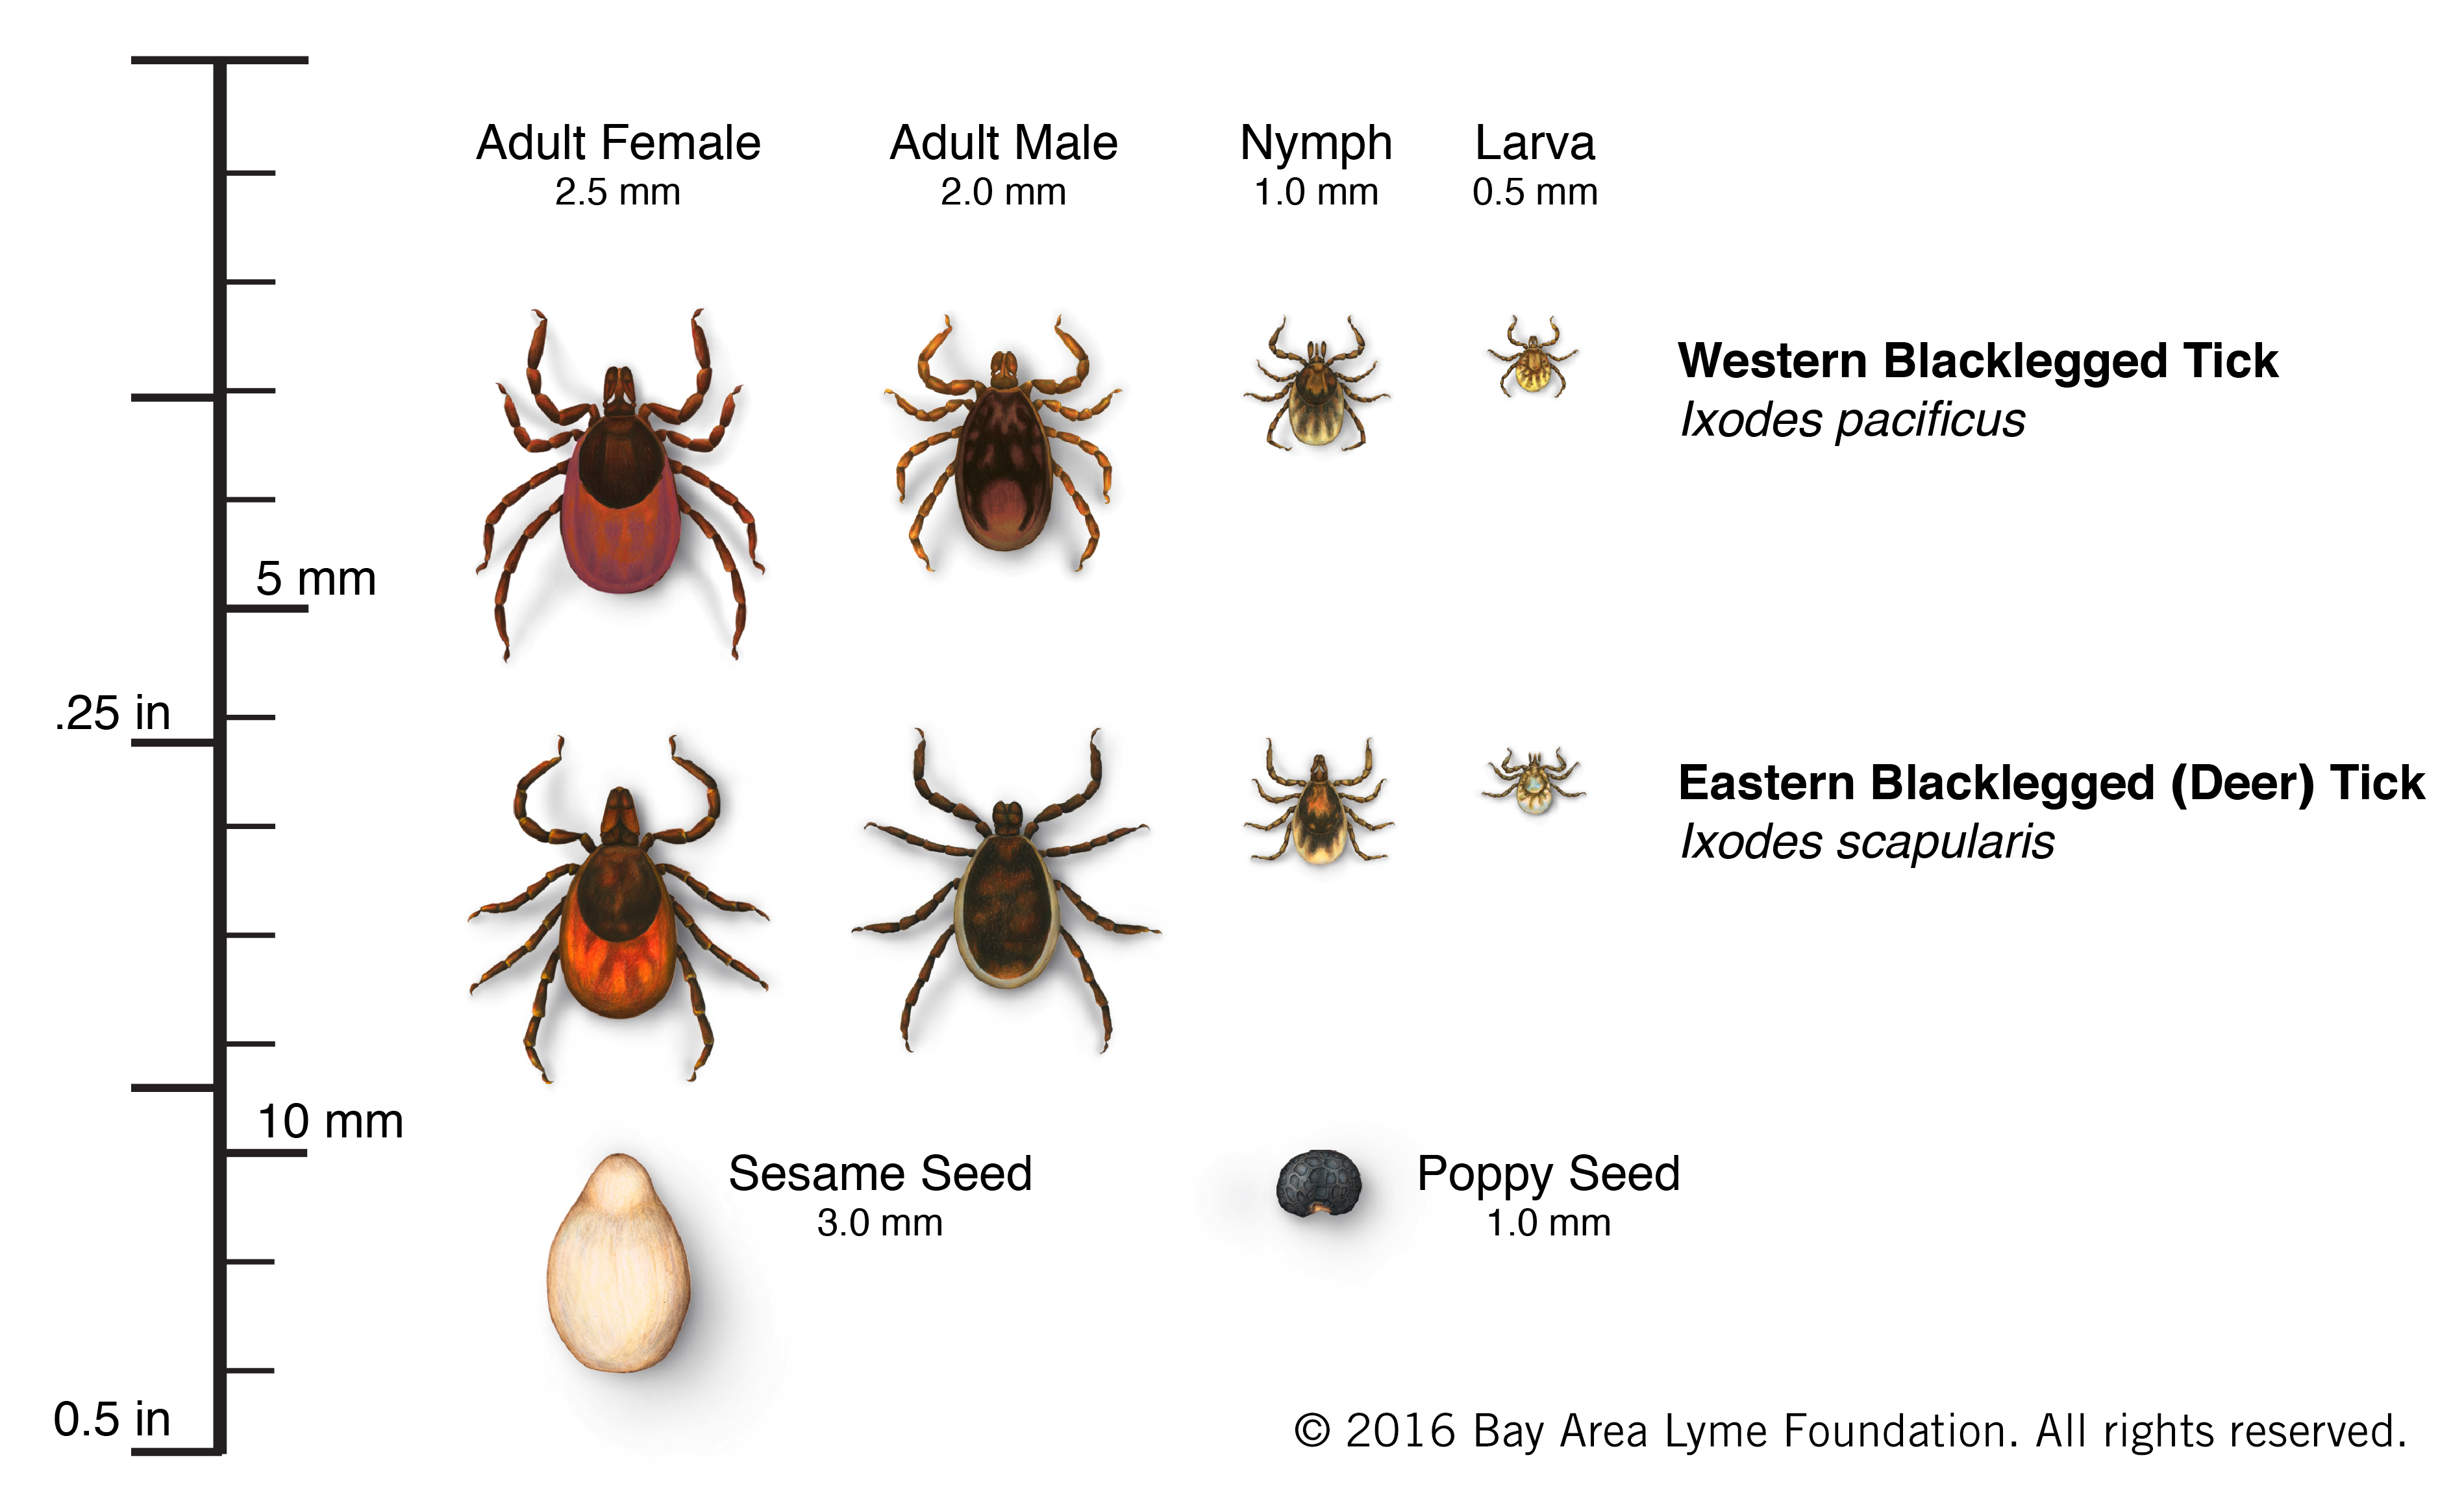
- Tick sizes
- Habitat:
- oak and pine forest (not grassland)
- shaded area with high humudity
- No human activity or disturbance
- Large and continuous forest lands (e.g., State Parks with no significant residential development)
- Low-lying vegetation
Nymph tick maintenance & transportation
- Date: July 12, 2021
- Draft: Brian Sulkow
- Consultation: Jose Filipe G T Cabral De Azevedo [UTHSC]
Materials
- Flask made of glass or non-porous plastic
- Plaster of Paris
- Dropper/pipette
- Nylon mesh with holes small enough so that ticks don’t escape
- Rubber bands
- Tweezers
- Sterile water
- Clean paper towels
- Ziploc bags
- Packaging material & box for shipping
Storage
- When at your home, ticks are kept at room temperature, in a room with natural light, but out of direct sunlight.
- Avoid the use of ice packs, which cause condensation and flooding of the vials
- Avoid bacterial growth in tick containers:
- Wear Gloves or Wash hands thoroughly.
- Sterile water- use sterile water (boil water for 5 mins, let cool, store in a sterile jar). Use bottled water.
- Sterile (enough) paper towels- open a new roll of paper towels.
Protocol
- Prepare tick vials with Plaster of Paris
- Use directions on the Plaster of Paris (PP) package to prepare an appropriate amount.
- Transfer wet PP to a vial: fill 1/8 to ¼ of an empty vial, from the base up, with wet PP. Note: Avoid getting PP on the walls of the vial above the mark you filled it to.
- Allow PP to dry: drying time for PP is 30 minutes to 2 hours. Ticks are put into the vial only after PP dries. Note-drying time differs from curing time.
- Drops of Water: Using a dropper prior to transferring ticks to a vial, put 2-3 drops (pipette 1.5 tips) of sterile water on the PP in the vial.
- Transfers ticks and cover the vial
- Using tweezers, transfer up to 30 ticks into a vial prepared with PP.
- Cover vial with mesh gauze: When ticks are transferred, cover the vial nylon mesh. Fasten mesh over the vial with a rubber band.
- Cuts in the mesh: Make cuts in the cap to allow air flow
- Transfer vials with ticks to a zip-lock bag
- Avoid suffocation: Vials should be placed upright into the Ziploc bag. To reduce the chance of suffocating the ticks, place vials in such a way that the mesh on top is not covered by the plastic walls of the zip-lock bag.
- Size of towel: From a larger paper towel, cut out a 2”x2” square. Fold the square a few times.
- Water on the towel: Add 0.5 ml of sterile water to the folded square.
- Towel placement: Place the towel to the Ziploc bags with the ticks. To reduce the chances of suffocating ticks, do not place the towel on mesh covers for vials, rather place the towel on side of the bag or the bottom of the bag.
- Packaging
- Take air out of the bag: Take most of the air out of the bag and close the Ziploc bag. To avoid suffocation, during this process do not let the walls of the bag cover the mesh tops of the vials.
- Before sending: Keep the closed Ziploc bag at room temperature, in a place with natural light, but out of direct sunlight.
- Boxing: In the late afternoon, when you are ready to take the Ziplock bags to FedEx, put the prepared Ziplock bags in a box. To avoid breaking vials when shipping, surround the Ziplock bag with packaging materials.
- Over Night Shipping Instruction: To lessen the likelihood of ticks being subject to extreme heat during shipping, bring boxed ticks to a Fed-Ex shipping center in the late afternoon. Arrange for next day delivery, before noon. Use the “First O/N” option.